The attributes section lets you edit the attributes compared between products in “Product Comparison”. When viewing products in the store front, customers have the option to add products to “Add to Compare” to analyze the similarities and differences between products in the store. Attributes can be used to describe the size, weight, color, and any other specifications of the product that have potential for comparison. You can create these attributes in the Catalog > Attributes area. To add attributes directly to products, visit the Attribute tab under Products.
| Try to create universal attributes that are consistent across specific categories of products. For example, if your shop sells computer monitors, you could create a ‘screen resolution’ attribute. This attribute needs to be added consistently to all the computer monitor products in your store. It is more likely that a person will compare two computer monitors, rather than comparing a computer monitor and a random product with different attributes. |
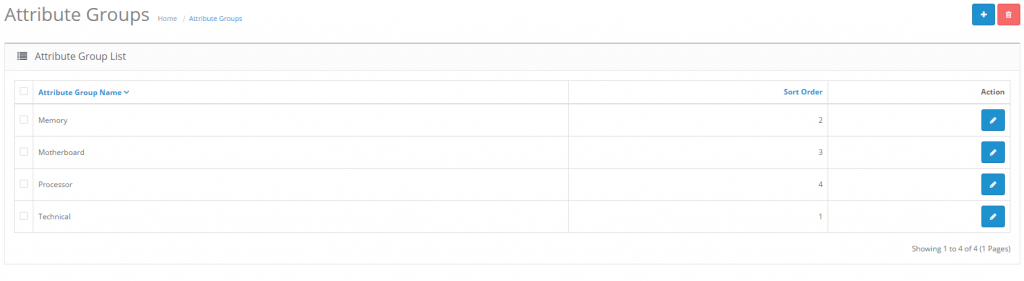
Attribute Groups
An attributes group contains related attributes that can be compared
under Product Comparison. Attributes such as ‘Clockspeed’ and ‘No. of
Cores’ can be organized under the larger attribute group of ‘Processor’.

To create an attribute group, go to Catalog> Attributes>
Attributes Group and click “Insert”. This form only requires an
attribute group name in “Attribute Group Name”. Adding the “Sort Order”
is optional. Adding a sort order will affect the arrangement order of
attributes under Product Comparison. The attribute groups created here
can have individual attributes added to them later.
Creating attributes
In Catalog > Attributes, attributes can be created, edited, and deleted.

To create a new attribute, click “Insert”. This button will direct you
to a page asking for the “Attribute Name”, “Attribute Group”, and “Sort
Order”.

The “Sort Order” determines the position of the attribute if the
product has multiple attributes assigned to it. The “Attribute Group” is
the larger group of attributes that this particular attribute will
belong to when assigned.
Attributes in the store front
At this point in the guide, you should be familiar with creating
attributes on the administration side; so let’s see how creating an
attribute in the back-end can affect the store front of the shop. For
the purposes of this example, we want to add a ‘Display’ attribute group
to help our customers compare the differences between “aspect ratio”
and “monitor size” attributes for our default laptop products in our
store.
Creating an attribute and attribute group for Product Comparison
The first step is to create a broader attribute group to store our
individual attributes, aspect ratio and monitor size. We will create
‘Display’ as our attribute group, under Catalog > Attributes >
Attributes Groups.

The next step is to create the specific attributes, Aspect Ratio and
Monitor Dimensions, with descriptions under Catalog > Attributes >
Attributes.
We type the name, Aspect Ratio, then assign it to the broader
attribute group “Display”. We assign 1 to sort order because we want
this attribute to be above all the other attributes in the Display
attribute group. When we click “Save”, “Aspect Ratio” will be added to
the attributes list. We create another attribute named “Monitor
Dimensions”, but we will change the sort order to 2, so that it appears
below “Aspect Ratio” under Product Comparison.
Assigning the attributes to a product
Now that we have the attributes created, we need to edit the
individual products to contain these attributes. To be consistent, we
will add “Aspect Ratio” and “Monitor Dimensions” to all of our laptop
products. We don’t want a scenario where our customers need to compare
different laptop products, but only one or two of our laptops has the
“Aspect Ratio” listed to compare.
To add attributes directly to a product we go to Catalog > Products, and click edit for our HP laptop product. In the Attributes tab,
we add the Aspect Ratio and Monitor Size attributes individually. The
text description must be manually added, so we add 16:10 to “Aspect
Ratio” and 19.3″ x 27.2″ to our monitor size. As seen below, when we
start typing “Monitor”, both the attribute group and attribute name is
displayed in the drop down box..

We will continue on by adding these two attributes individually to all of our laptop products.
Viewing the attributes in Product Comparison
In the store front we added the Sony VAIO and HP LP3065 laptops to
our product comparison from their respective product pages. Under the
Product Details we can see our Display attributes group (highlighted by
the red box). Since we gave the group a sort order of 1 when we inserted
it into the attribute group list, it was the first attribute group
displayed. Within the “Display” group, our “Aspect Ratio” and “Monitor
Size” attributes are listed according to their sorting order. The
specific text we included in the attribute section under Products is
shown under each respective product column.

Our customers can now make a more informed decision with their purchase
by comparing the Display attributes in Product Comaprions. Understanding
how to use attribute groups and attributes with products can help raise
the level of customer satisfaction.